If you’re looking for a traditional RAID enclosure, the Drobo Mini probably isn’t for you. If you’re looking for a fast multi-drive enclosure, the Drobo Mini reallyisn’t for you. The Drobo Mini is geared toward people who don’t know, and don’t want to know anything about RAID, who might have a handful of drives they’d like to put to use.
With a Drobo Mini you don’t have to use identical drives, or even drives with the same capacity or speed. You can throw a 80GB drive and a 500GB drive in a Drobo and it’ll give you as much protected storage capacity as it can without you having to do anything. That said, the Drobo doesn’t always act as you might expect, and the extreme ease of use comes at the cost of performance.
Before you can use your Drobo Mini you have to install the Drobo Dashboard software and put some drives in the Mini. Drobo Dashboard is easy to find and install; other than being a little slow to find our Drobo I didn’t have any major problems with it. The dashboard can warn you when you’re running low on space and can email you alerts, as well as format and restore your Drobo.
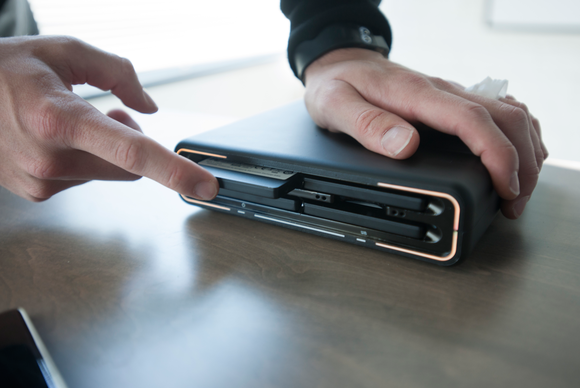
The magnetic front panel is super easy to remove (almost too easy at times), it just sort of comes off. Behind the panel are four slots for 2.5-inch drives; all you have to do is push the drive in till you hear a click. It feels like you’re inserting gigantic SD cards. You can start with just two drives, but I put four in right away.
Once your drives are installed and the front cover is back on, plug in the power cord. The power cord has a locking mechanism you can use by twisting the plug in the back of the Drobo—this way the power cord won’t slip out of your Drobo accidentally.
When you connect your drive to your Mac or PC with Thunderbolt or USB 3 and follow the prompts to format it, don’t be surprised that it shows up as a 17.5TB volume—Drobo is just making sure that when you add capacity, it won’t have to recreate the volume visible to the OS.


